• Skip to main content

Louisville Web Nerds

  • About
    • Reviews
    • FAQs
    • Referrals
  • Services and Pricing
    • Small Business Website Design
    • WordPress Help, Support, and Maintenance
    • WordPress Migration
    • Project-Based Consulting (Hourly)
    • WordPress Training for Your Staff
    • WordPress Website Audit
    • WordPress Hosting
    • Support Plan AddOns
  • LWN Blog
  • Contact
    • Leave a Review
  • Account
    • Update Your Card
    • Payment and Financing Options

Wordpress Guides

Mar 07 2023

Two Simple WordPress Security Methods You Should Be Using on Your WordPress Website

WordPress runs over 40% of the Internet, which makes it a target for attackers for many reasons.

Fortunately, WordPress is incredibly flexible and has an incredible amount of community support, so there are several ways to make it more robust and secure using free plugins.

Here are two simple WordPress security methods you should be using on your website to prevent it from being compromised. This isn’t everything you should be doing, but these methods are very simple and very effective.

wordpress security

Use Two-Factor Login WordPress Security

Two-Factor authentication has become far more common in the last several years. This method of security involves an additional and different authentication method after the initial username and password authentication step.

Typically, this is a text message to a phone number or a code you enter from an app. Either is a solid method of adding a second layer of security to your website.

To use this method in WordPress, I recommend using the Wordfence Login Security plugin, a free lightweight solution by the makers of the Wordfence application firewall.

wordpress security 2FA

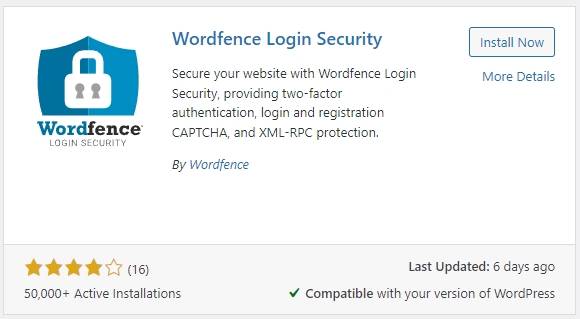
Simply install it from the plugin directory inside your WordPress website, and then activate it. From there, you’ll click on the plugin from the side menu, and follow the prompts to download a 2FA app, scan the supplied QR code, and begin generating your 2FA codes.

Make sure to save the backup access tokens as well in case you lose access to your device. This will keep you from getting locked out of your website.

From there, you can configure several options on the plugin, but I recommend at a minimum to set that all Admin users and even Editors are required to use 2FA authentication. This does a great job at preventing scripted break-in attempts to your website.

Honorable mention: The full Wordfence plugin is great as well if you want far more security options, however it’s a bit of a bear to configure if you’re a novice. Feel free to ask us for help with this.

Hide Your Default Login URL

Another simple security method is to hide your default login URL. All WordPress websites have a default login URL which is known to anyone that wants to access it. This plugin allows you to take advantage of rewrite rules to change that URL to something more secure.

For example, instead of example.com/wp-admin, I could use example.com/admin-login-url, or something more difficult to guess.

This simple step goes a long way because most brute-force login attempts will just move onto the next site if they can’t access the default URL.

To use this method, I recommend the free WPS Hide Login plugin, which is incredibly light and very widely used.

hide wordpress login

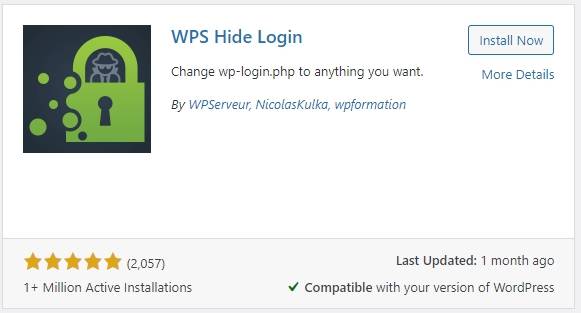
Again, just download it from the plugin directory, and configure the options to use whatever URL you want. Make sure to save this URL somewhere safe, as your default URL will no longer work.

Need Help With Your WordPress Website?

You’re welcome to set these up yourself by following the instructions above, or contact Louisville Web Nerds for assistance with your website. We’ll be happy to implement these techniques and keep an eye on your website for you with our widely popular monthly WordPress support packages. With these packages, we aim to take all of the technical work out of your hands so you can focus on growing your business.

Written by Cody Wheeler · Categorized: Wordpress Guides

Aug 07 2017

How to Set Up Your Very Own Web Hosting Account and Website

To build a website, the absolute first thing you need is webhosting (not a domain – we’ll handle that later). Just like you can’t build a house without land, you can’t build a website without a web server. Your web hosting account is where this web server will be.

Once you have hosting, you can start building the website.

Don’t worry. We’ll handle all of the technical details. Just follow the guide for now and we’ll do the rest towards the end.

What I recommend for hobby blogs and side businesses is Bluehost. It’s by far the easiest low-cost host to work with and is a very solid platform for hobbyists.

If you’re running a website that is critical to your business, you’re far better off with higher end hosting such as our Premium WordPress Hosting options.

(If you don’t want to buy a hosting account, you can get in touch with us to ask us about our hosting options, but they will cost a little bit more since we’ll be managing the account. The upside is you can pay a small monthly fee rather than annually. We’ll be happy to help either way.)

If you want to own the account, which I recommend that you do, just follow the steps below to get started.

1.) Choose your hosting package

Bluehost has a few different starter options, two of which are shown here.

bluehost hosting options

To get signed up, go ahead and click this link. This will get you my partner discount for Bluehost, which is the lowest cost possible – Bluehost

Which should you choose?

The “Basic” package is just fine. It allows one website, which is probably all you need right now.

The “Plus” package lifts some of the limits and lets you add more than one website, gives you unlimited space, and a few other perks, but unless you’re planning on building more than one website you’re probably fine with the “Basic” package for now.

Both are very reasonably priced so I’ll leave it up to you. Just click the one you want and move forward. There is definitely no need for anything more than that for hobbyists.

2.) Choose your domain name

On the next screen you’ll be asked to choose a domain name. Go ahead and make this decision now and enter it in the box on the left and click Next.

bluehost domain selection

It’ll be A LOT easier to set up with this already chosen up front. You won’t have to buy one through GoDaddy or anything like that. Getting it all from the same place makes things WAY easier.

If you’ve already bought one from somewhere else, enter it in the box on the right and click Next.

(Make sure you are 100% certain with what you choose because it’s a bit difficult to transfer a website to a different domain once it’s set up.)

After you do this you’ll be taken to a payment screen with more confusing options to choose from. Don’t worry. I’m gonna walk you through this. 🙂

3.) Choose your hosting options

– You’ll enter your name, address, etc on the screen and then you’ll see a “package information” box where you select your hosting options.

bluehost packages

The cheapest “monthly” option is to pay for 36 months in advance (this can sometimes vary with promotions), but that’ll cost more money of course. I would recommend just choosing the “Basic 12 Month Price” option unless you want more for any reason.

This will get you started for the lowest cost possible and you’ll be good for one year (it’ll auto-renew after a year). Again, if you don’t feel comfortable buying your own hosting, just get in touch with us and we’ll be happy to help you get set up.

Also, make sure to un-check all of the other checkboxes in this section. You don’t need any of them for a new hobby blog. They’ll just add unnecessary cost.

From there, enter your payment info and click “Submit” Congratulations. You now have your very own web hosting account!

Ok, just one more step.

4.) Set up your login and send it over to us

From here, you will get an email from Bluehost with additional steps to confirm your email address, set up your password, etc. Complete these steps to confirm your account.

Once you have your Username and Password from Bluehost, I will need you to send that to me at help@louisvillewebnerds.com so I can install and configure your WordPress installation.

Note: Sometimes Bluehost installs WordPress by default if you select that option. We will need that login as well if you get it. Basically, anything from Bluehost, just email it over to us. You may also get other emails from software providers during the signup process. Send those over as well.

(TIP: If you don’t want to receive marketing emails, go into Bluehost and uncheck all of the promotional email boxes. They’ll send you partner offers otherwise.)

5.) Now it’s our turn

From there, we’ll take a few actions to get you started off on the right foot with your new website:

  • Get rid of all of the junk software that comes with WordPress out of the box
  • Configure your website for SEO, speed, and security with the latest software
  • Set you up with auto-updates for your software
  • Set you up with a premium framework and theme included in the cost of your setup (a $129 value in itself).

Once everything is set up, we’ll send you some helpful links and tutorials as well as how to get logged in and get started.

You can feel free to ask questions via email and and if you ever need us to do any additional work on the website from there, we’ll be happy to help at our normal hourly rate.

Written by Cody Wheeler · Categorized: Wordpress Guides

  • About
  • Services
  • AddOns
  • Referrals
  • Reviews
  • Disclaimer


Copyright © 2025 · Louisville Web Nerds LLC All Rights Reserved
Based in Louisville, KY. Providing Services to the Surrounding Areas.